Building A 3 Piece Shaker Crown Molding
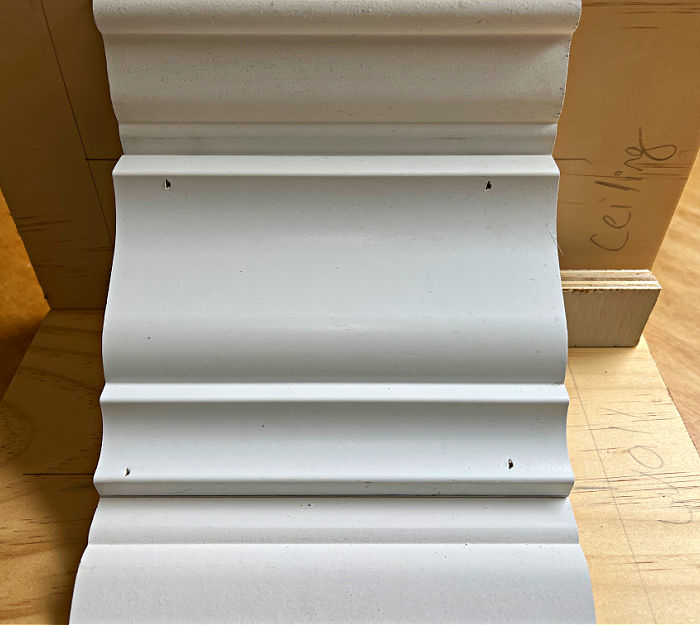
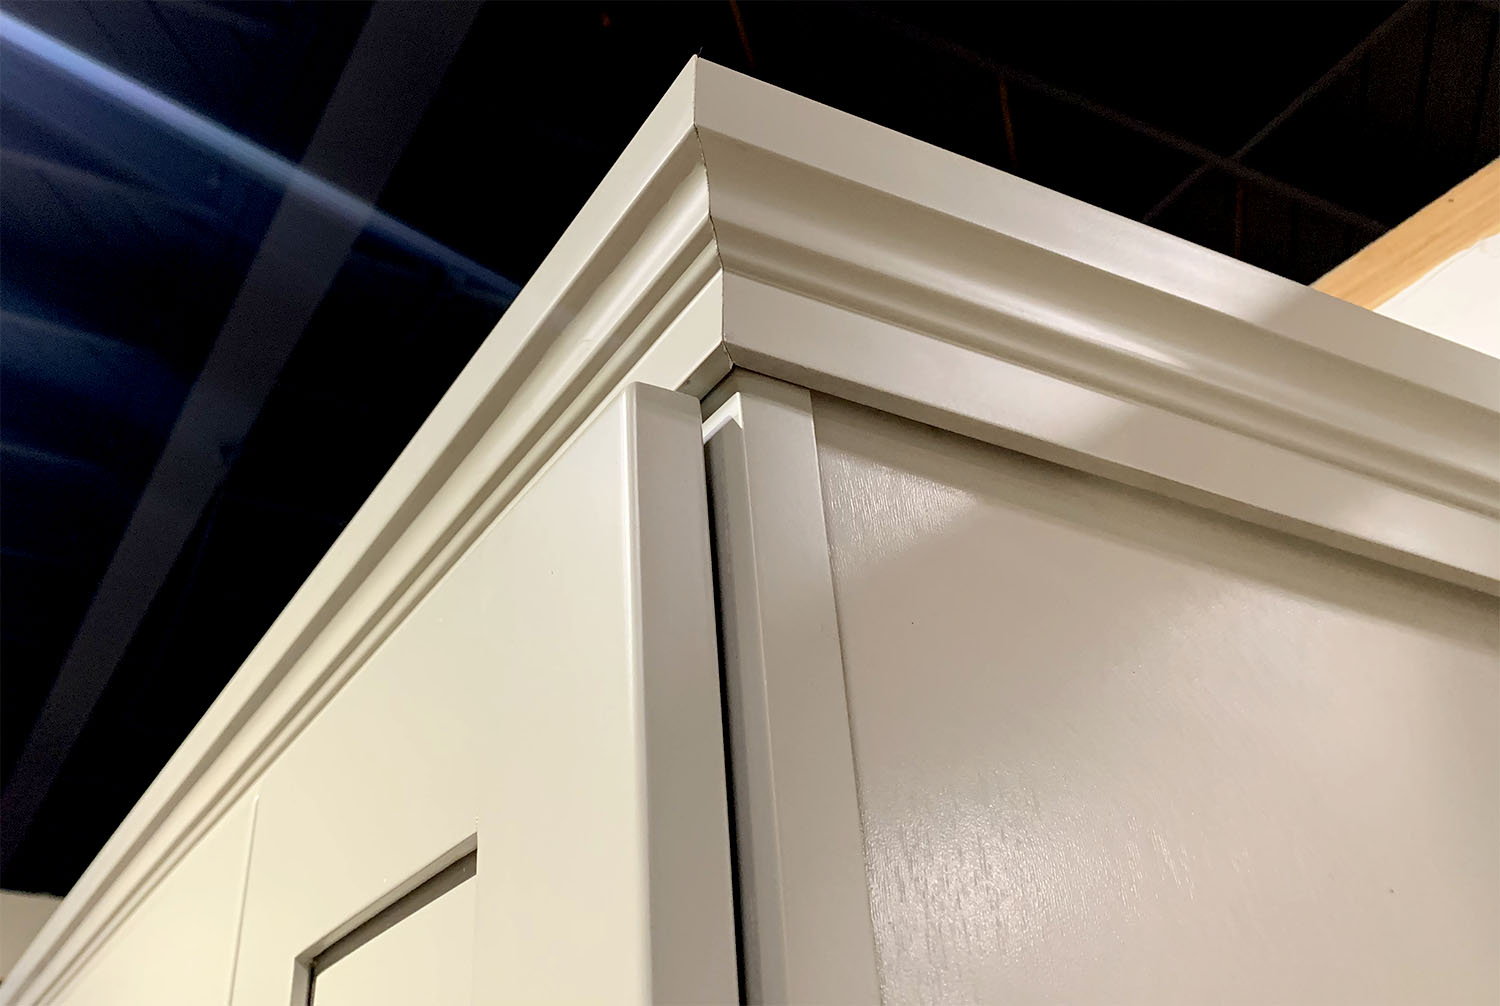
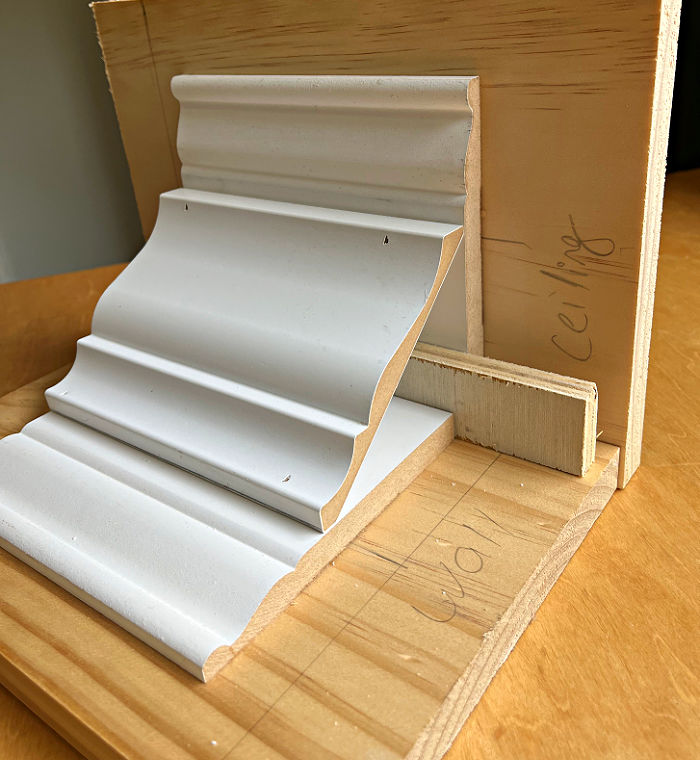
Building A 3 Piece Shaker Crown Molding - Styles of crown molding include. First, we’ll need some wood like maple, oak, cherry, pine, poplar, etc. It gets a 1/2 back board about 4 tall and a @ 2 3/4 standard crown then a thin bead at about. Use 1 1/4 brad nails or longer for this three piece crown molding. I recently ordered a custom insert shaper cutter and. I needed to make some of shaker style crown molding that had pretty much become the standard in the shop. Plus we’re using a new tool, the miter aid!! Use 3 seperate trim profiles to build up a larger crown molding. Making a simple, flat shaker style crown molding is an easy diy project. I’m thinking that the cap “should” be able to mostly hide the gaps between the crown and the wall. The main problem here is molding repetition from the lower anchor up in the cornice. Next, we’ll need a table saw with. First, we’ll need some wood like maple, oak, cherry, pine, poplar, etc. Crown molding is a popular choice as it offers a timeless and elegant look, seamlessly bridging the gap between cabinets and ceiling. Use 1 1/4 brad nails or longer for this three piece crown molding. Find property information for 4970 shaker heights court #202, naples, fl 34112. Making a simple, flat shaker style crown molding is an easy diy project. In this article, we’ll go through the easiest and fastest way to make a basic crown riser molding that will act as a filler, close a gap on the top of your cabinets, or add another. The second problem is this tapering pattern creates a weak cornice, and i know you don’t want a weak cornice. Plus we’re using a new tool, the miter aid!! (see below for a shopping list and tools.)subscribe to this o. The second problem is this tapering pattern creates a weak cornice, and i know you don’t want a weak cornice. Watch tony and chris install 3 piece crown molding, we literally have it figured out! Three bedrooms, three bathrooms, and a den. It gets a 1/2 back board about. The second problem is this tapering pattern creates a weak cornice, and i know you don’t want a weak cornice. First, we’ll need some wood like maple, oak, cherry, pine, poplar, etc. Find property information for 4970 shaker heights court #202, naples, fl 34112. Making a simple, flat shaker style crown molding is an easy diy project. The current kitchen. The main problem here is molding repetition from the lower anchor up in the cornice. Use 1 1/4 brad nails or longer for this three piece crown molding. The second problem is this tapering pattern creates a weak cornice, and i know you don’t want a weak cornice. In this article, we’ll go through the easiest and fastest way to. I’m thinking that the cap “should” be able to mostly hide the gaps between the crown and the wall. Multi/3 piece crown molding install. I recently ordered a custom insert shaper cutter and. Use a miter saw for cuts, includes how to work around a. Styles of crown molding include. Use 3 seperate trim profiles to build up a larger crown molding. Next, we’ll need a table saw with. I recently ordered a custom insert shaper cutter and. In this article, we’ll go through the easiest and fastest way to make a basic crown riser molding that will act as a filler, close a gap on the top of your. Plus we’re using a new tool, the miter aid!! The second problem is this tapering pattern creates a weak cornice, and i know you don’t want a weak cornice. Watch tony and chris install 3 piece crown molding, we literally have it figured out! Multi/3 piece crown molding install. I recently ordered a custom insert shaper cutter and. Watch tony and chris install 3 piece crown molding, we literally have it figured out! The second problem is this tapering pattern creates a weak cornice, and i know you don’t want a weak cornice. Next, we’ll need a table saw with. Kitchen is around 220 sqft. In this article, we’ll go through the easiest and fastest way to make. Next, we’ll need a table saw with. I recently ordered a custom insert shaper cutter and. I use a 3 piece crown that makes for a beautiful look either to the ceiling or not. Plus we’re using a new tool, the miter aid!! Styles of crown molding include. Styles of crown molding include. I’m thinking that the cap “should” be able to mostly hide the gaps between the crown and the wall. Find property information for 4970 shaker heights court #202, naples, fl 34112. It gets a 1/2 back board about 4 tall and a @ 2 3/4 standard crown then a thin bead at about. Crown molding. I would like to use some type of crown filler / moulding to close this gap so it doesn't accumulate dust. Plus we’re using a new tool, the miter aid!! (see below for a shopping list and tools.)subscribe to this o. The current kitchen set up uses a large soffit which were. In this article, we’ll go through the easiest. Use 1 1/4 brad nails or longer for this three piece crown molding. Styles of crown molding include. (see below for a shopping list and tools.)subscribe to this o. I needed to make some of shaker style crown molding that had pretty much become the standard in the shop. Making a simple, flat shaker style crown molding is an easy diy project. Find property information for 4970 shaker heights court #202, naples, fl 34112. I’m thinking that the cap “should” be able to mostly hide the gaps between the crown and the wall. Plus we’re using a new tool, the miter aid!! I use a 3 piece crown that makes for a beautiful look either to the ceiling or not. In this article, we’ll go through the easiest and fastest way to make a basic crown riser molding that will act as a filler, close a gap on the top of your cabinets, or add another. Kitchen is around 220 sqft. The second problem is this tapering pattern creates a weak cornice, and i know you don’t want a weak cornice. I would like to use some type of crown filler / moulding to close this gap so it doesn't accumulate dust. It gets a 1/2 back board about 4 tall and a @ 2 3/4 standard crown then a thin bead at about. Next, we’ll need a table saw with. Use a miter saw for cuts, includes how to work around a.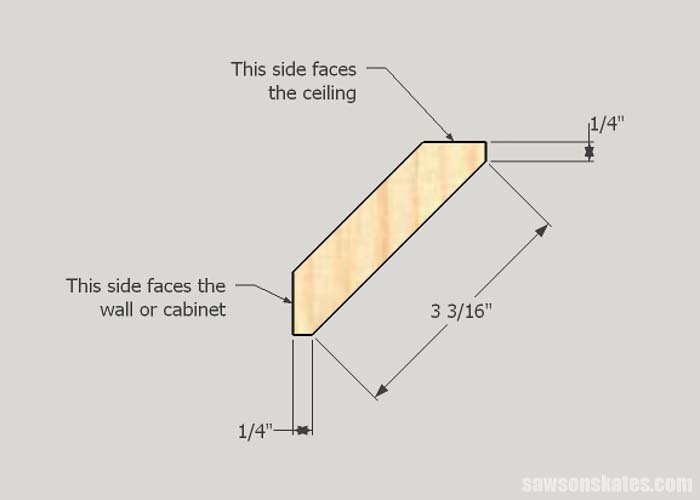
How to Make Shaker Style Crown Molding (Video) Saws on Skates®

How to make shaker style crown molding video Artofit

How to install three piece crown molding Artofit
Installing Beautiful Three Piece Crown Molding DIY Steps and Video

How to Install Builtup Crown Molding Fine Homebuilding
How To Install Crown Moulding On Frameless Matttroy

ThreePiece Crown Molding Three Common Mistakes The Joy of Moldings
Installing Beautiful Three Piece Crown Molding DIY Steps and Video
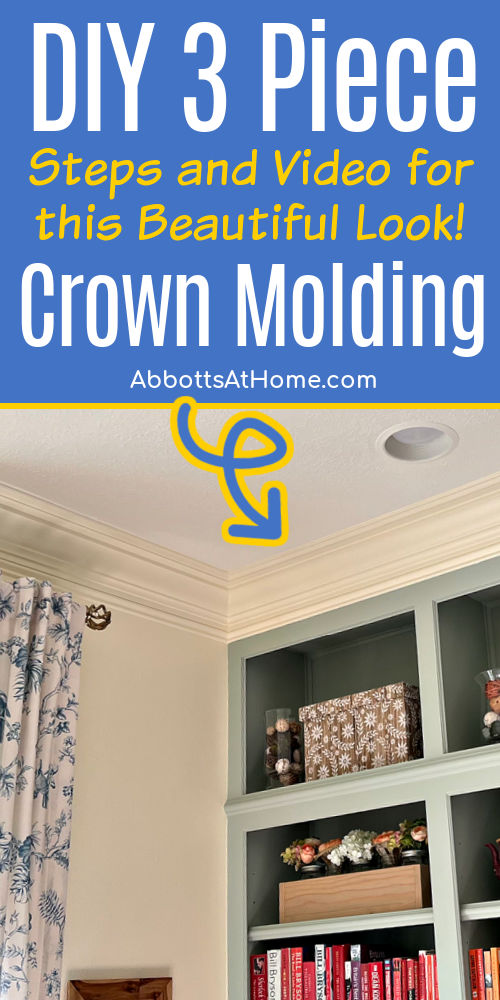
Installing Beautiful Three Piece Crown Molding DIY Steps and Video
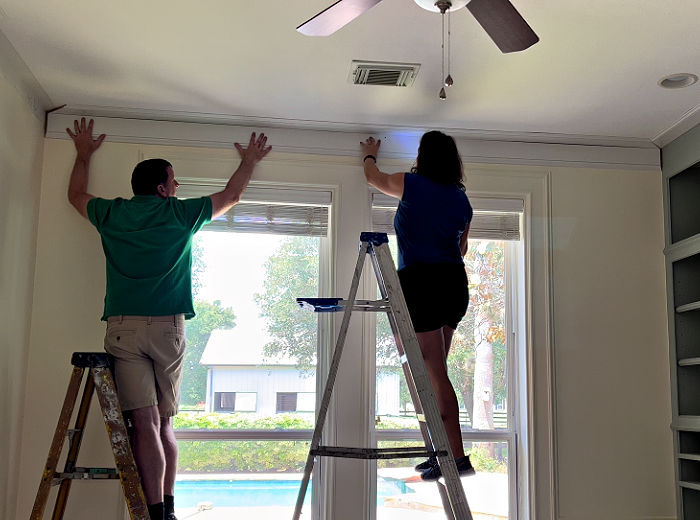
Installing Beautiful Three Piece Crown Molding DIY Steps and Video
Use 3 Seperate Trim Profiles To Build Up A Larger Crown Molding.
Multi/3 Piece Crown Molding Install.
The Main Problem Here Is Molding Repetition From The Lower Anchor Up In The Cornice.
Read The Diy Steps And See Photos Here:
Related Post: