How To Build Drawers
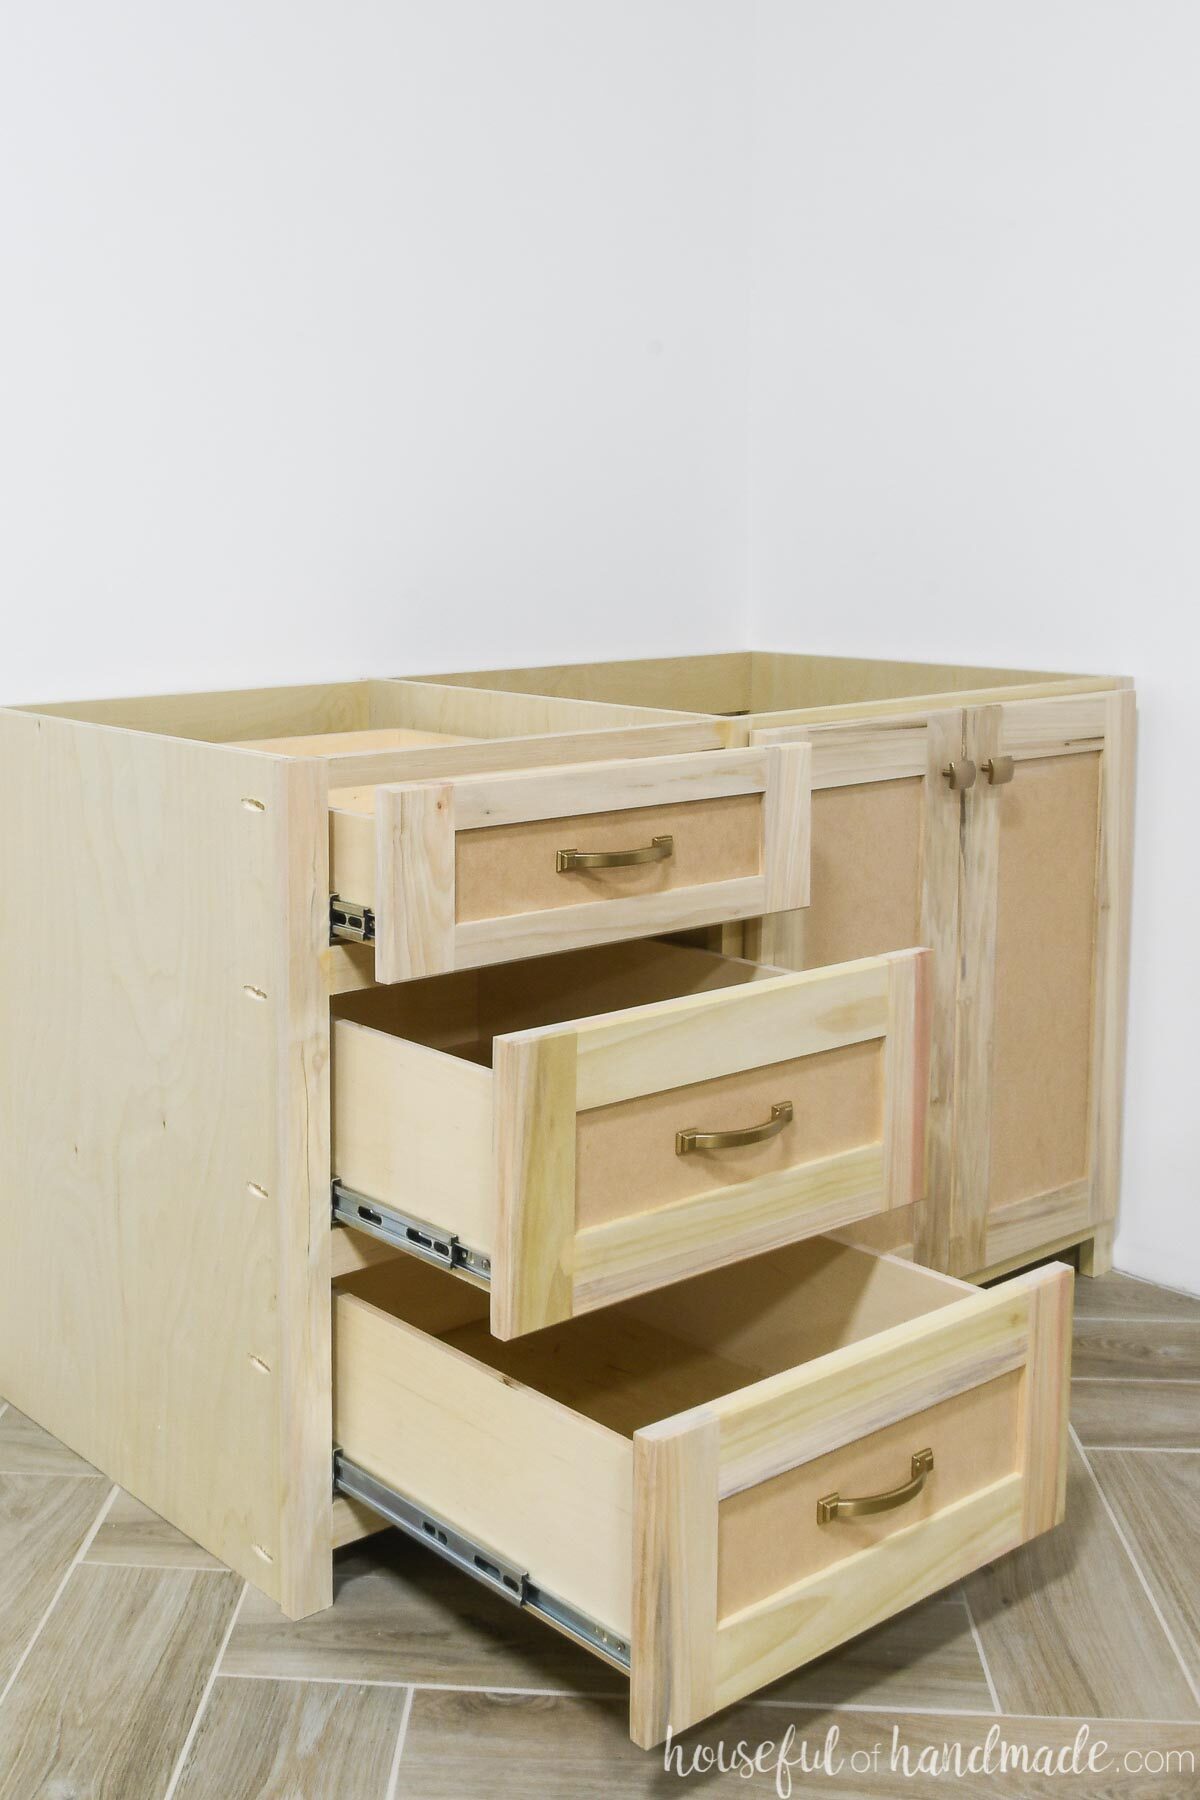
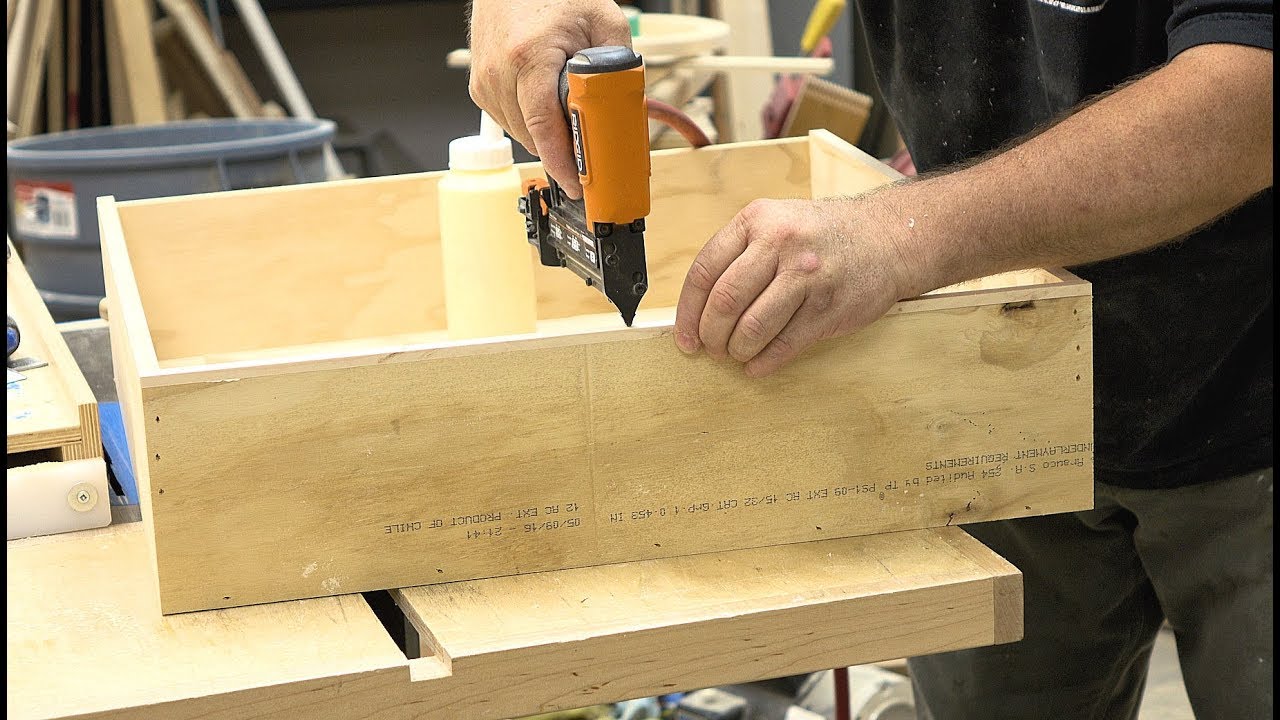
How To Build Drawers - Be sure to watch the video above which shows the process and a bonus clip on an alternate drawer bottom for larger drawers. These drawer measurements are based on using drawer slides that are 1/2″ thick which is pretty standard. You can use a speed square to confirm if they make a 90° angle. When you position the holes for the adjustable shelf supports, don’t rely on measurements and arithmetic. In this tutorial, i’m going to show you how to build a cabinet drawer using the easiest possible method. I’ll use a pocket hole jig to easily build. Let's create something great together. Here's the easiest (nearly foolproof) way to build and install drawers with ease. Tiktok user kelsi from @cedar_hill_builder is a woodworker who specializes in diys and making them accessible to everyone. Attach each drawer face to the front of each drawer frame with 2, 1 1/4″ brad nails to hold in place, then follow with 1″ wood screws from the inside of the drawer into the drawer face. All you need are your drawer pieces, wood glue and a drill/driver. These instructions use measurements for the exact size drawer needed for my coffee bar table. Let's create something great together. Maybe you never thought you’d be able to do it before, but trust it. I'm sharing this to make your journey smoother and more enjoyable. Each method has its pros and cons. There is no special tools (but there could be if you wanted) and with some patience, anybody can do this and update a kitchen, or add some to a piece of furniture. In this tutorial, i’m going to show you how to build a cabinet drawer using the easiest possible method. Start by cutting the wood for the drawers according to the wood cut list above. Follow along to see how you can quickly build any size drawer using this simple method. You can also see a more detailed blog post at: I assembled these using pocket holes and screws, but if you wanted, you could just use wood screws through the sides. This post may contain affiliate links. Let's create something great together. I have used these methods of building drawers in all my builds since i started building 6+ years. Learn how to make cabinet drawers. With the help of a clamp, hold both pieces together and insert screws into the pilot holes. Want to download this plan? Are you looking to add a drawer to an existing cabinet or piece of furniture? In this episode, wood magazine's kevin boyle gives you some great tips on how to make the. Learn how to make cabinet drawers. I have used these methods of building drawers in all my builds since i started building 6+ years ago. Repeat the process with the other pieces as well to create the outer frame. There is no special tools (but there could be if you wanted) and with some patience, anybody can do this and. I’ll use a pocket hole jig to easily build. You can use a speed square to confirm if they make a 90° angle. I have used these methods of building drawers in all my builds since i started building 6+ years ago. All you need are your drawer pieces, wood glue and a drill/driver. Learn more about how to build. I have used these methods of building drawers in all my builds since i started building 6+ years ago. Align the 24” piece with the 6’ piece, ensuring they form a 90° angle. Attach each drawer face to the front of each drawer frame with 2, 1 1/4″ brad nails to hold in place, then follow with 1″ wood screws. These diy drawers are quick to make, are very strong, and you can even make all the cuts with a circular saw. Let's create something great together. Watch the other segments to learn how to install them. I’ll use a pocket hole jig to easily build. However, you can use the tips and steps below to make any drawer! There are three ways to build a drawer: ***this post contains referral or affiliate links. Each method has its pros and cons. You can also see a more detailed blog post at: Follow along to see how you can quickly build any size drawer using this simple method. Just adjust your measurements to fit your opening. But based on your skill level and your particular set of tools, there is. It’s an easy project you can complete in just a couple of hours using plywood and a few basic tools, even if you’re a beginner. If your drawer slides are a different thickness, you may need to adjust. These drawer measurements are based on using drawer slides that are 1/2″ thick which is pretty standard. It is a way for this site to earn advertising fees by advertising or linking to certain products and. With the help of a clamp, hold both pieces together and insert screws into the pilot holes. I've got my drawer material milled to. In this instructable i'll show you how to make drawers in 6 easy steps. Attach each drawer face to the front of each drawer frame with 2, 1 1/4″ brad nails to hold in place, then follow with 1″ wood screws from the inside of the drawer into the drawer face. Just adjust your measurements to fit your opening. To. In this tutorial, i’m going to show you how to build a cabinet drawer using the easiest possible method. Just adjust your measurements to fit your opening. You've come to the right place! It’s an easy project you can complete in just a couple of hours using plywood and a few basic tools, even if you’re a beginner. I like to build my drawer boxes with ¾″ plywood for the sides and ¼″ plywood for the bottoms. You can build diy drawers without a table saw or a router. Follow along to see how you can quickly build any size drawer using this simple method. Attach each drawer face to the front of each drawer frame with 2, 1 1/4″ brad nails to hold in place, then follow with 1″ wood screws from the inside of the drawer into the drawer face. If your drawer slides are a different thickness, you may need to adjust your measurements. Choose the right one for your project and skill level, from beginner to advanced! There are three ways to build a drawer: These diy drawers are quick to make, are very strong, and you can even make all the cuts with a circular saw. Be sure to watch the video above which shows the process and a bonus clip on an alternate drawer bottom for larger drawers. Here's the easiest (nearly foolproof) way to build and install drawers with ease. Or are you making a new nightstand or dresser and are stuck on how to make a drawer box? Each method has its pros and cons.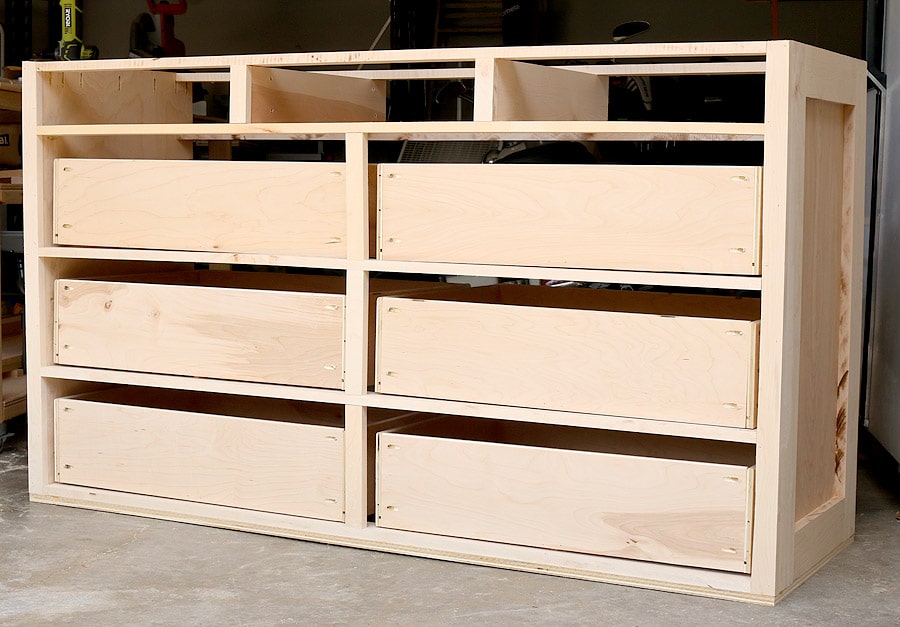
How to build a dresser

How to build drawers a complete guide to drawer making Artofit

How to Make Drawers in 6 Easy Steps FixThisBuildThat How to make
3 Easy Ways to Build DIY Drawers Houseful of Handmade
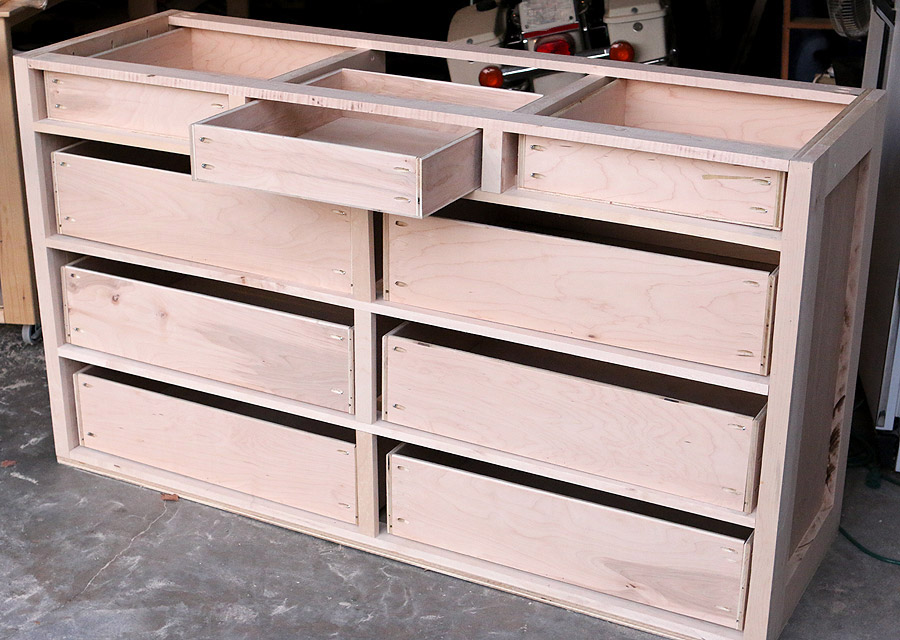
How to build a dresser

I never knew it was so easy to build drawers! This tutorial breaks down

How to Build a Basic Drawer diy drawer, simple drawer, build a drawer

Building drawers is made easy with this step by step guide. It walks
How To Make Drawers Fast And Easy YouTube

How To Build Plywood Drawers, Strong, Easy and FAST! YouTube
This Post May Contain Affiliate Links.
Repeat The Process With The Other Pieces As Well To Create The Outer Frame.
There Is No Special Tools (But There Could Be If You Wanted) And With Some Patience, Anybody Can Do This And Update A Kitchen, Or Add Some To A Piece Of Furniture.
Learn How To Build A Drawer Box Three Different Ways!
Related Post: