How To Build Robotic Arm
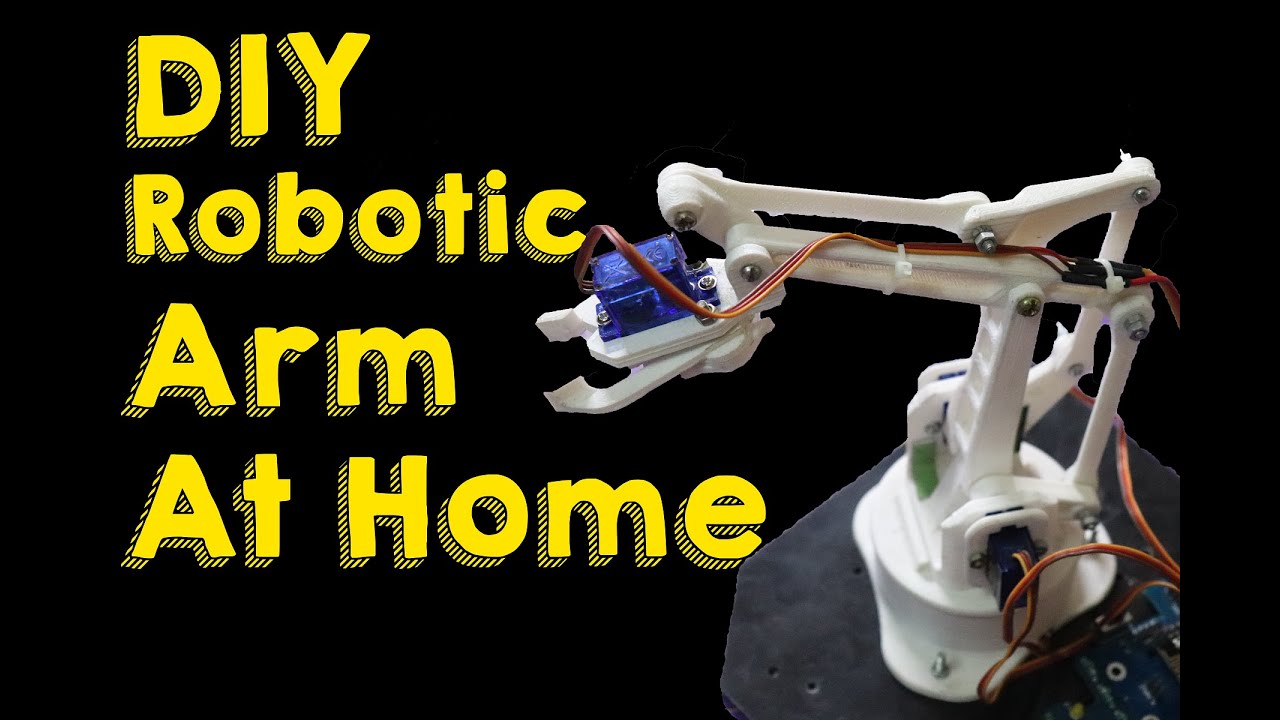
How To Build Robotic Arm - Before diving into the project, it’s essential to understand the basic concepts and terminology related to robotic arms. In this tutorial, we will build a robotic arm with six degrees of freedom from scratch. To see how i create the arm and to see it's tests, you can check out the video Finally, the robotic arm is fully programmable. In this video, we’ll walk you through the entire process—from hardware assembly to training a mach. This enables the robot to lift payloads of up to 5 kg per arm. This 5 dof robotic arm project is perfect for kids to take a sneak peek into the world of industrial robots and see how they work. X, y, z, and rotation about each of those axes in the case of our robotic arm). The robotic arm can be controlled by a controller that i show you how to make, or can even be controlled by a computer via an arduino, which i will show how to do in a later tutorial. In this article, we’ll break down the basics of designing a robotic arm, from choosing the right materials to selecting the right motors and controllers. With careful calibration and testing, you can successfully transform your robotic. In this project, we have built a simple robotic arm, which is fully automated to do certain tasks. This project is perfect for beginners interested in robotics, engineering, or mechanics. Then, human operators can confirm the. In this detailed step by step tutorial we will go through the process of building a robotic arm using a 3d printer, nema stepper motors, arduino mega, cnc shields, belts and pulleys, idlers, bolts an other materials. With little more than a 2c motor and a roll of pla filament, you can construct the 31 parts needed to build this rugged and flexible arm that can be assembled in less than an hour. Apart from the microcontroller (we have used arduino uno) and servo motors, all other components that are part of the arm were collected from office scrap (mostly). This article will show you how to build a simple robotic arm that is able to move around and point at things through external potentiometers. Sketch out your robot arm — considering its purpose, size, and range of motion. You can design the robotic arm at any mechanical cad software and this design at autodesk inventor. Perfect for beginners and hobbyists, this project introduces essential concepts of robotics, 3d printing, and programming while allowing for personalization and creativity. In the end, you’ll have a. While we sometimes take them for granted, human arms and hands are pretty amazing. With this information, you’ll be well on your way to designing a robotic arm that suits your needs.. Learning to build a robot arm will teach you how to breadboard a circuit, how to program your arduino, and how to work with moving parts. It is very similar to my 2 servos + thumbstick instructurable. Then, human operators can confirm the. In the end, you’ll have a. X, y, z, and rotation about each of those axes in. We can use them for tasks that require a lot of speed and strength, like swinging a baseball bat, and for tasks that. In this tutorial, you’ll learn how to create a 3d printed robotic arm controlled by an arduino. Then, human operators can confirm the. X, y, z, and rotation about each of those axes in the case of. Introducing the diy robot arm controlled by human gestures. This 5 dof robotic arm project is perfect for kids to take a sneak peek into the world of industrial robots and see how they work. In this instructurable i will show you how to make a simple robotic arm controlled by 4 servos , 2 analog joysticks, and an arduino. The robotic arm can be controlled by a controller that i show you how to make, or can even be controlled by a computer via an arduino, which i will show how to do in a later tutorial. This enables the robot to lift payloads of up to 5 kg per arm. With this information, you’ll be well on your. Also, i made my robotic arm without using 3d printing or laser cutting which make it very easy to build. Apart from the microcontroller (we have used arduino uno) and servo motors, all other components that are part of the arm were collected from office scrap (mostly). Learn how to make a robotic arm autonomous, moving beyond manual control to. It is very similar to my 2 servos + thumbstick instructurable. With little more than a 2c motor and a roll of pla filament, you can construct the 31 parts needed to build this rugged and flexible arm that can be assembled in less than an hour. With careful calibration and testing, you can successfully transform your robotic. Introducing the. While we sometimes take them for granted, human arms and hands are pretty amazing. You can design the robotic arm at any mechanical cad software and this design at autodesk inventor. We are going to explore the process of creating your own robotic arm from scratch, the materials that you will need, and the challenges you may encounter along the. In this tutorial, we will build a robotic arm with six degrees of freedom from scratch. A degree of freedom is the number of variables needed to fully describe the position and orientation of a system (e.g. With little more than a 2c motor and a roll of pla filament, you can construct the 31 parts needed to build this. Learn how to make a robotic arm autonomous, moving beyond manual control to execute repetitive tasks efficiently. The robotic arm can be controlled by a controller that i show you how to make, or can even be controlled by a computer via an arduino, which i will show how to do in a later tutorial. The tools for the movable. With this information, you’ll be well on your way to designing a robotic arm that suits your needs. Sketch out your robot arm — considering its purpose, size, and range of motion. In this project, we have built a simple robotic arm, which is fully automated to do certain tasks. Byu robotics experts are building a humanoid robot that can impressively lift large and unwieldy objects such as ladders, kayaks, car tires, chairs, and heavy boxes. In this instructurable i will show you how to make a simple robotic arm controlled by 4 servos , 2 analog joysticks, and an arduino uno. The tools for the movable arms are interchangeable. By following the coding steps in pictoblox, you can program precise movements and actions, making it suitable for applications in industries like manufacturing and medical fields. With little more than a 2c motor and a roll of pla filament, you can construct the 31 parts needed to build this rugged and flexible arm that can be assembled in less than an hour. Perfect for beginners and hobbyists, this project introduces essential concepts of robotics, 3d printing, and programming while allowing for personalization and creativity. We can use them for tasks that require a lot of speed and strength, like swinging a baseball bat, and for tasks that. A degree of freedom is the number of variables needed to fully describe the position and orientation of a system (e.g. The robotic arm can be controlled by a controller that i show you how to make, or can even be controlled by a computer via an arduino, which i will show how to do in a later tutorial. Before diving into the project, it’s essential to understand the basic concepts and terminology related to robotic arms. This project is perfect for beginners interested in robotics, engineering, or mechanics. In this video, we’ll walk you through the entire process—from hardware assembly to training a mach. In this tutorial, you’ll learn how to create a 3d printed robotic arm controlled by an arduino.
Easy to Build and Programmable Robotic Arm 19 Steps (with Pictures
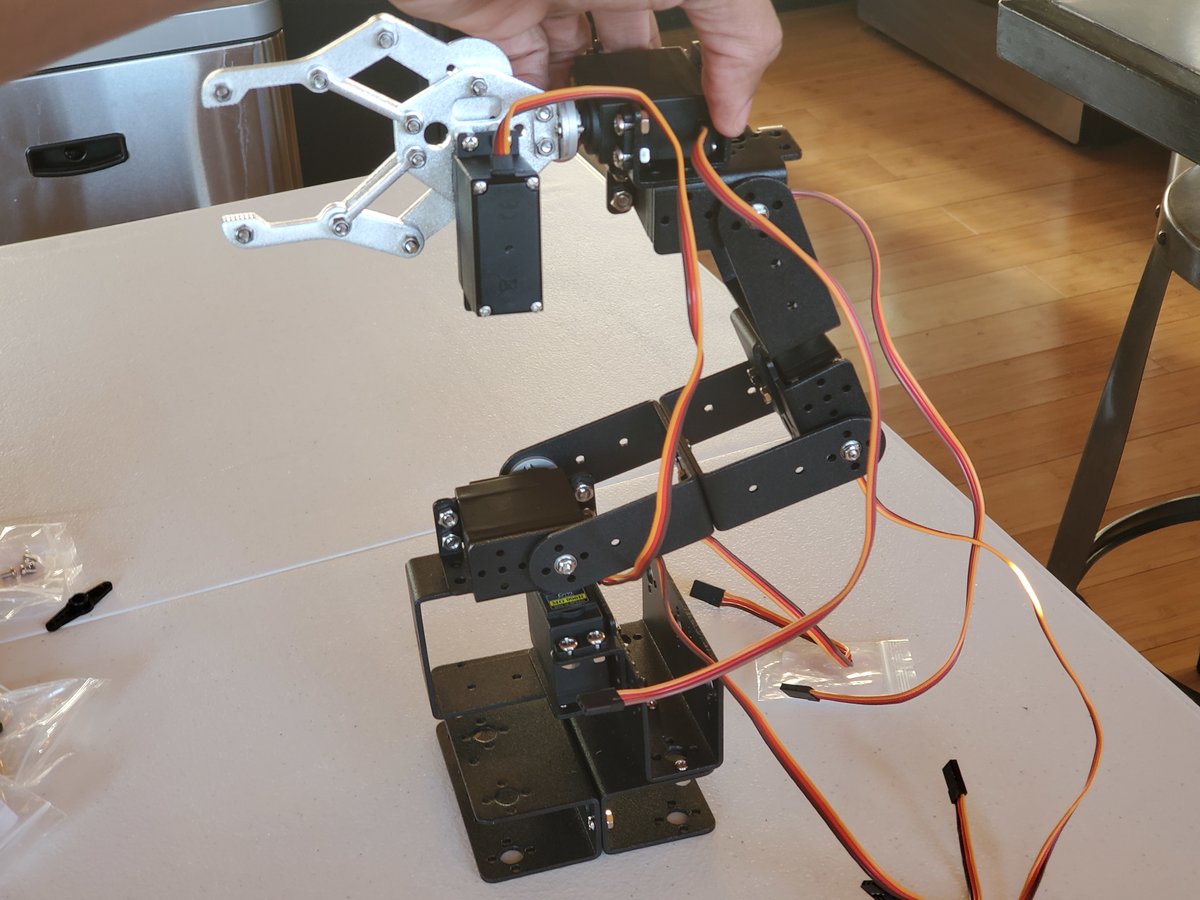
How to Build a DIY Aluminium 6DOF Robotic Arm From Scratch

DIY Arduino Robot Arm with Smartphone Control YouTube
How to make robotic arm at home v1.0 YouTube

How to Make a Robotic Arm at Home using Cardboard YouTube
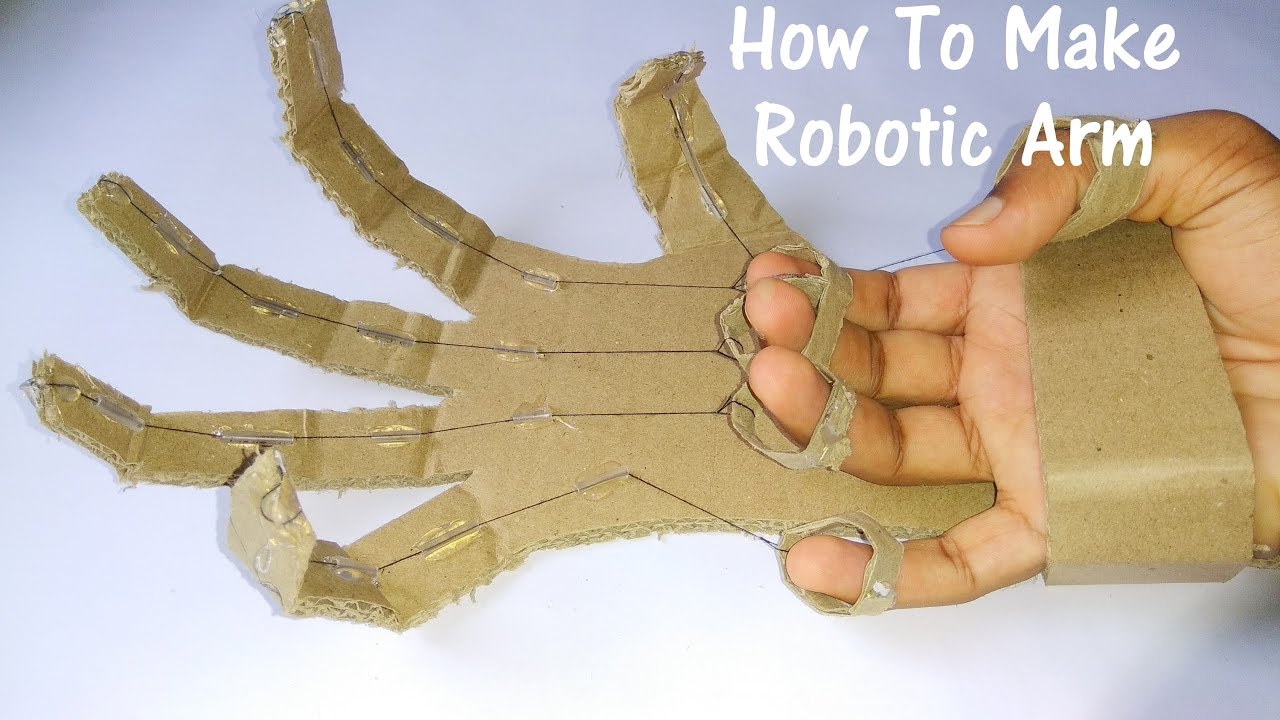
How to Make Robotic Arm Using Cardboard YouTube

How to make Simple Robotic Arm For Beginners Amazing idea! Wow

Robot Arm Arduino App 8 Steps Instructables

How to Build Robotic Arm A StepbyStep Tutorial ARCTOS

How to Make Hydraulic Robotic Arm from Cardboard! YouTube
Then, Human Operators Can Confirm The.
This Article Will Show You How To Build A Simple Robotic Arm That Is Able To Move Around And Point At Things Through External Potentiometers.
With Careful Calibration And Testing, You Can Successfully Transform Your Robotic.
Imagine Being Able To Control A Robotic Arm With Just The Movement Of Your Hand, Mimicking The Synergy Between Humans And Machines Seen In Blockbuster Films Like Pacific Rim Or Avatar.
Related Post: